
List Manager
| | List Manager is an Advanced User feature. |
The List Manager screen is used for filtering customer and supplier data, creating customer and supplier lists and exporting the resulting information. The List Manager dialog can be opened by clicking on the List Manager link in the Command Window or by right-clicking on the grid and selecting 'List Manager' (or 'Add to / Open List Manager') in the following screens:
-
[ Customer | List ] -
[ Supplier | List ] -
[ Sales Summary | Customer ] -
[ Accounts | Debt Management | Debtors / Creditors (Debtors Only) | Actions ] [ Sales Invoice Manager | Staged Processing Grid ][ CRM Manager | Comm Log (Leads) ]
Notes:
- The results can be sent directly to the List Manager by ticking the Send directly to List Manager checkbox in the following areas:
- The Sales Summary Filter dialog in
[ Sales Summary | Customer ]. - The
[ Customer | List ]screen. - The
[ Supplier | List ]screen.
- The Sales Summary Filter dialog in
- The List Manager screen can be maximised to make it easier to view the data.
For more information about the List Manager see The List Manager page which contains an example of how it can be used.
List Manager Dialog
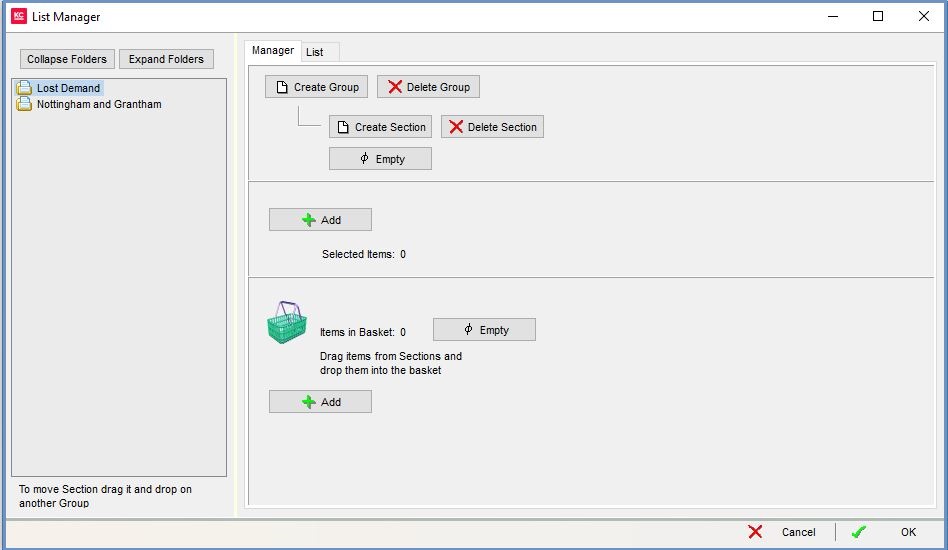
The List Manager dialog box consists of three areas:
- Group Display Area common to both the Manager and List tabs
- Manager tab used to create the sections and folders in the Group Display Area and add customers to the sections.
- List tab enables the user to do something with the lists of customers in the sections, for example email them, attach a keycode or create a Comm Log entry.
Group Display Area
The Group Display Area on the left of the List Manager dialog displays any groups that have been created and any sections that are linked to them. Groups hold sections (sometimes referred to as lists; this should not be confused with the List tab), which can be given appropriate names, for example, Buyers in 2021 or Non-Buyers in 2020. Items are added to the sections rather than the groups.
 : collapses all the folders in the display area.
 : expands all the folders in the display area.
Note: to expand or collapse one section, double-click on it.
Notes:
- If there are any items contained in the sections, then the number of items is shown in brackets besides the section, eg one company in a section would be displayed as (1).
- Sections can be selected by clicking on them, for example when adding, removing or deleting items.
- Sections can be moved between groups by dragging and dropping them.
Note: from this point forwards sections will be referred to as "Lists".